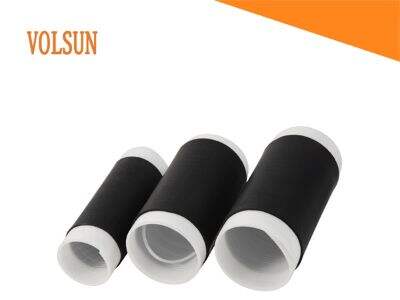
Un tubo termorretráctil siempre debe instalarse sobre una superficie limpia y seca. Una de las cosas más importantes que puede hacer al usar el tubo termorretráctil epdm de Volsun tubo de retraimiento frío EPDM es asegurarse de que su superficie de trabajo esté perfectamente limpia y seca. Esto permitirá una adecuada adhesión del tubo y un sellado fuerte para garantizar protección. Recuerde limpiar previamente el cable o conector de cualquier suciedad o humedad utilizando un paño antes de comenzar la instalación.
Tenga cuidado al estirar y deslizar el tubo termorretráctil sobre el cable o conector.
Después de este método, limpie y seque la superficie para prepararla para la instalación del tubo termorretráctil en frío. Comience estirando lentamente y de manera uniforme el tubo para asegurarse de que quede correctamente colocado sobre el cable o conector. Ahora puede comenzar a deslizar el tubo sobre el cable, asegurando una buena y firme adherencia. Tómese el tiempo necesario para leer y seguir las instrucciones con el fin de evitar problemas durante la instalación.
El núcleo interno, extráigalo y el tubo se encogerá naturalmente debido a la contracción del material.
Una vez que el tubo termorretráctil en frío esté en su posición final sobre el cable o conector, es momento de iniciar el proceso de retracción. Tire suavemente del núcleo interno del tubo y este se retraerá para formar un sello hermético sobre la superficie. El tubo se ajustará alrededor del cable o conector, logrando un ajuste más seguro y resistente frente a factores ambientales.
Fije el tubo y apriete el cable o conector. Verifique que el tubo termorretráctil frío esté completamente envuelto alrededor del cable o conector de forma firme y sellado una vez finalizado el proceso de retracción. Si el tubo parece flojo o se desliza hacia dentro y hacia fuera, tire suavemente de él para asegurarse de que no se mueva. El Volsun tubo frío contraíble de silicona debe proporcionar un ajuste apretado, sólido y perfectamente seguro para proteger realmente la superficie contra daños o desgaste con el tiempo.
Revise si hay burbujas de aire o espacios dentro del tubo para asegurarse de que haya reemplazado correctamente el filtro.
Debe revisar el tubo termorretráctil frío en busca de espacios o burbujas de aire que pudieran haberse introducido durante el proceso de instalación. Presione suavemente el tubo para verificar que todas las partes estén firmemente adheridas a la superficie. Si encuentra algunos espacios o burbujas de aire, coloque cuidadosamente nuevamente el tubo para que quede completamente sellado y seguro, garantizando así la protección adecuada. Revisar esto evita imperfecciones futuras y confirma una instalación perfecta del tubo termorretráctil frío.
La forma correcta de instalar el tubo de curado en frío es muy importante y añade una vida extra a los cables y conectores.
Simplemente siga estos pasos uno por uno, y tenga cuidado de fijar bien el tubo sobre la superficie para que no permita el paso del agua. Antes que nada, asegúrese de que la superficie esté limpia y seca al comenzar, estire y deslice el tubo lentamente (sin movimientos bruscos), luego déjelo encogerse firmemente en su lugar y verifique que quede uniforme. Siguiendo estos consejos, podrá realizar la instalación de tubos termorretráctiles en frío de manera eficiente para una protección duradera. Elija Volsun tubo de Retracción Fría y obtenga una mejor protección para su aislamiento de cables y aislamiento de conectores, extremadamente duradera.
Tabla de Contenido
- Tenga cuidado al estirar y deslizar el tubo termorretráctil sobre el cable o conector.
- El núcleo interno, extráigalo y el tubo se encogerá naturalmente debido a la contracción del material.
- Revise si hay burbujas de aire o espacios dentro del tubo para asegurarse de que haya reemplazado correctamente el filtro.
- La forma correcta de instalar el tubo de curado en frío es muy importante y añade una vida extra a los cables y conectores.

